
Direct: 1-800-220-0779
Puerto Rico Toll-Free: 1-855-823-8056
AT&T Forms - How to Dispatch a Form
Dispatching allows an administrator to choose which mobile user should fill out a form, and to provide important information on the task.
For example, you can direct a technician to a customer location, with instructions on the work to be done there. This can help mobile workers arrive prepared for their next site visit, allowing them to get right to the central task at hand.
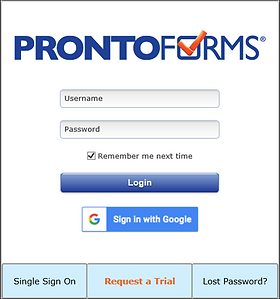
Login to Pronto Forms Application
-
From your desktop or mobile device go to:
https://live.prontoforms.com/security/login -
On the Login screen in the Username field, type your Username
-
In the Password field, type your password information
-
Click the Login button

Dispatching from FC Forms Web
After navigating to the desired form, click the Dispatch button beside the form name. Note: if this button is not available, turn on dispatching for this form first.
-
Click the Edit Form button.
-
Select the Settings tab.
-
Select Allow form to be dispatched to mobile users.
-
Choose either:
-
Form can be dispatched to app inbox only OR
-
Form can be dispatched OR started by user from the Forms tab.
-

-
First, select a user to dispatch the form to

-
Fill out any fields you want pre-filled for the user, leave all other fields blank

-
Click the Dispatch button at the bottom of the screen
Dispatch Metadata with FC Forms
It is possible to dispatch data into the following fields:
-
Notes: These can be a maximum of 256 characters
-
Priority: This can be Low, Normal or High. If you do not assign a priority it will default to Normal or No Priority
-
Due Date: If you do not supply a timezone, it will default to the dispatcher’s team timezone
-
Location: Type in an address
Easily assign notes, priorities, due dates, and locations to dispatches, giving mobile users the tools they need to efficiently plan their work in the field. Your mobile users can get a high-level look at their assigned jobs without needing to look at each individual form: they can sort based on the information right from the inbox.

How to Dispatch into Metadata Fields
-
Additional boxes at the top of the dispatch screen, allow you to fill in the metadata information. Just add the information you need. You do not have to fill out every piece of metadata information.

-
The notes will display beneath the dispatched form’s name on your mobile user’s inbox. The others can act as filters by tapping the different tabs at the top of the inbox.

Bulk Dispatch with a CSV File
-
At the top of the dispatching screen of the desired form, select "Bulk Dispatch”.

-
Click the link to download the dispatch template

-
Do not alter any of the text in the template. Enter the data to dispatch, and the user to dispatch to, in the appropriate columns. Each row is a new dispatched form.

-
Upload the updated file with the "Choose File" button

-
Click the Dispatch button at the bottom of the screen
Dispatching Forms in FC Web
Dispatching allows an Administrator to choose which resource will need to fill out a form, and to provide important information on the task. For example, you can direct a technician to a customer location, with instructions on the work to be done on-site. This can help resources arrive prepared for their next site visit, allowing them to get right to the central task at hand.

Once you have logged in to FC Web, you are automatically navigated to the Tracking screen. On this screen you can access the Activities functionality from the Main menu.
-
On the upper left side of the tracking screen, click the Main Menu dropdown arrow
-
Select Activities

Adding Activities
Dispatch Activities are tasks that need to be performed at a specific location, assigned to a Resource, and then monitored in terms of their progress. Activities can be created from the Activities screen of FC Web.
Create a Dispatch Activity via Activities Screen
-
From the Main Menu, select Activities
-
Click the blue Plus (+) button to the right of the screen

Activity Screen
-
The Activity screen allows you to send location information to the resource.
-
Locations must be entered manually into the address fields.
-
Your forms must be created in advance in order to search and attached them to the activity.
-
When the activity and form are completed it will show up in history with a link to the form
-
Clicking this link in the Task Tracker mobile application will take users to the FC Forms screen where they will need to log in to the fc forms mobile app to view the form